Appointments are made using the Booking App which can be accessed from several parts of the website.
Many of the instances of the App are limited to specific types of services, for example, 90-minute Training Sessions, or a free Discovery Appointment. Your dedicated Client Page will give access to services that are relevant to you.
The following example shows how to use the App to make a DoCP supervision appointment.
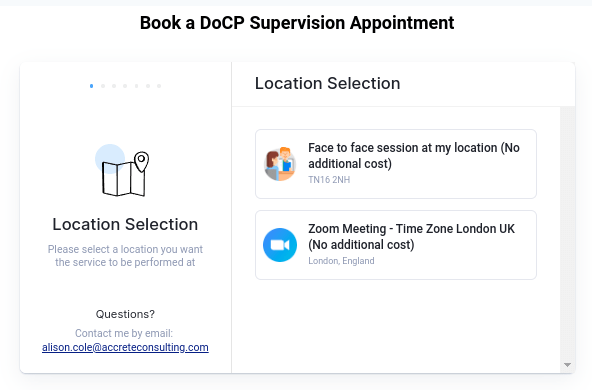
The Booking App on your dedicated Client Page is configured to show only those services that are relevant to you – in this example, as seen on the title bar, a DoCP supervision appointment.
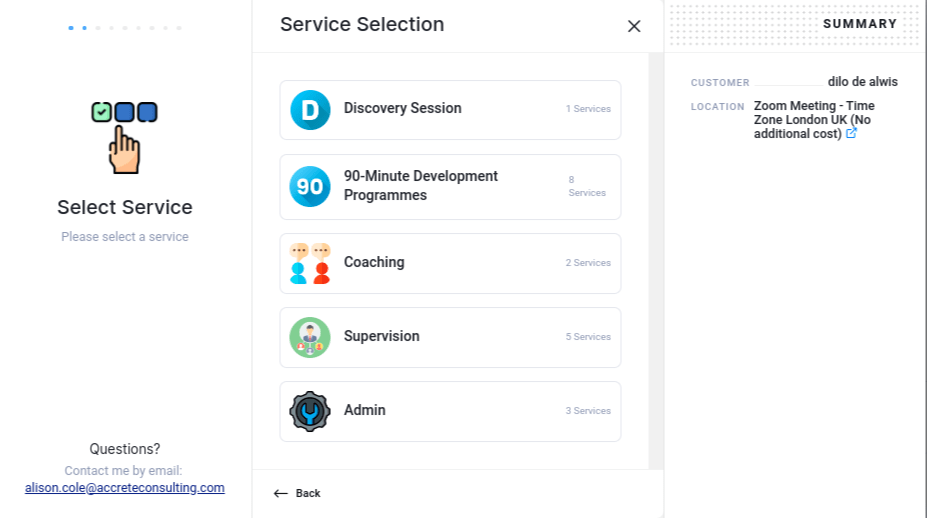
The Booking App that is located in the Client Dashboard shows all of the available services – it should only be used to book a new service, for example, a training session.
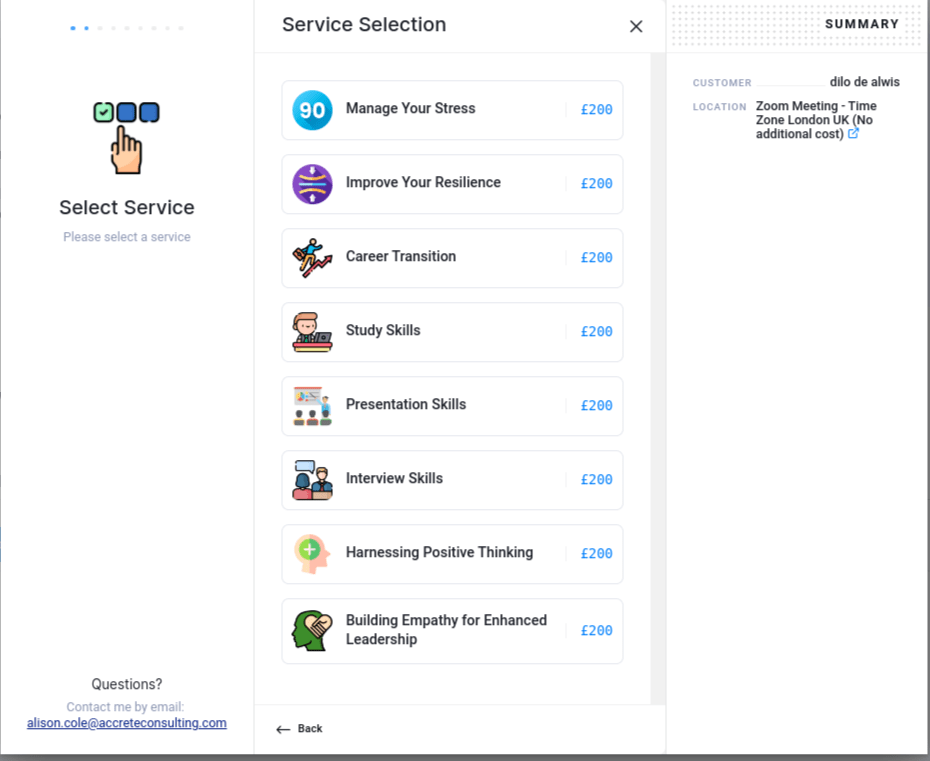
In this example, the 90-Minute Development Programmes button has been selected and now opens a list of those services.
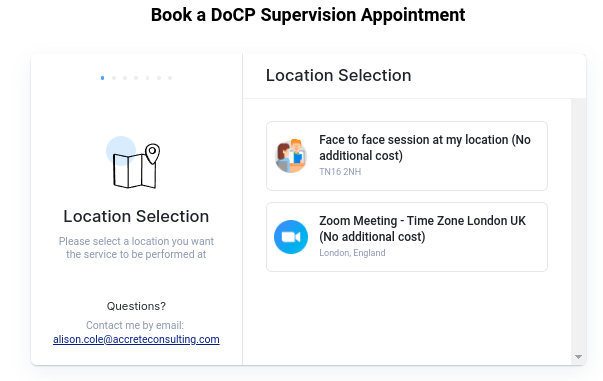
On your client page, clicking on the Book and Appointment button will open the booking app.
You have to select the location for your appointment first. In this example, between a Face to Face meeting or an online one via Zoom.
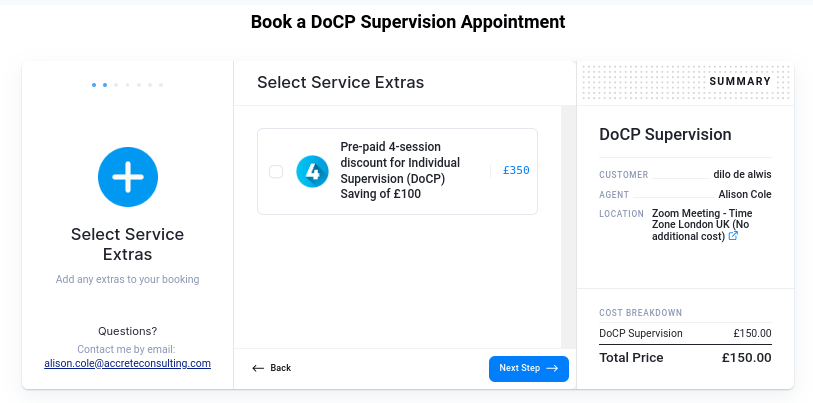
Once you select the location, you will see this page. There is a summary on the right hand tab. The central tab will show any extras available, such as block-booking discounts.
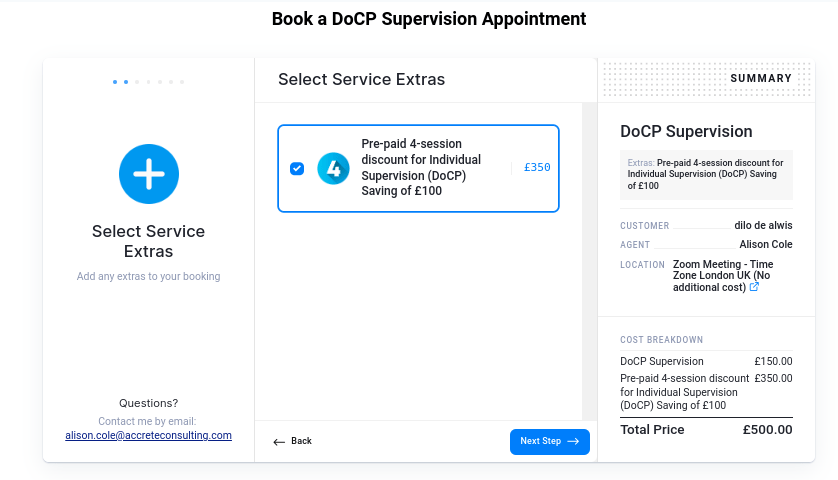
If you selected a service extra, the next page will look like this, showing the extra added to the summary tab.
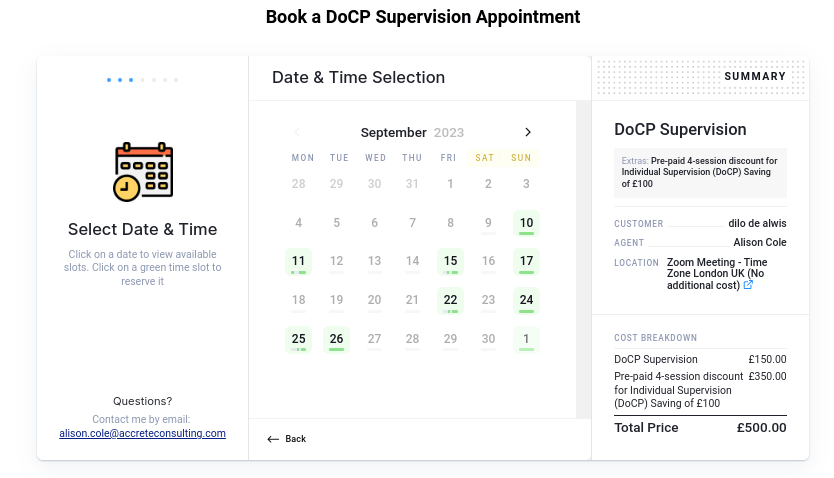
The next page will allow you to select a date for your appointment. Available days will be indicated in green.
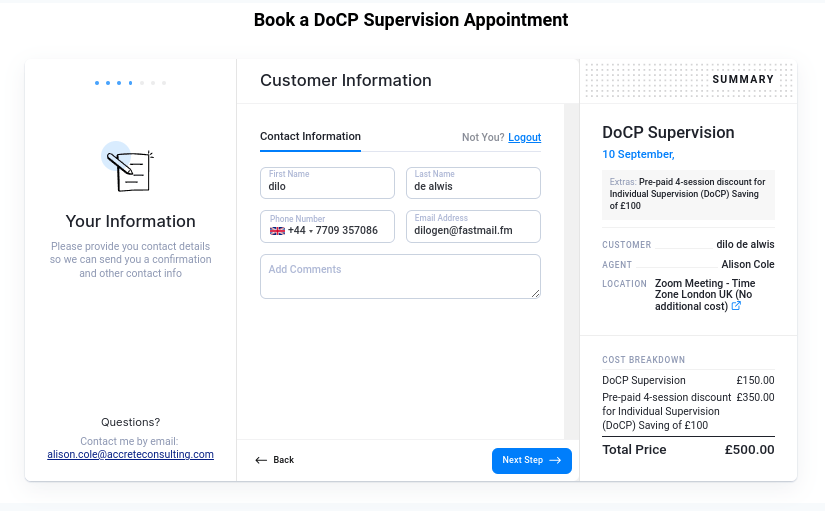
When you select a date, available time slots will show below

Once you select a time, the next page will ask you to create an account, if this is the first time you use the booking app, or to login, if you already have an account.
Once you login, the payment options page will allow you to Pay Now, via Stripe, a secure card payment gateway, or to Pay Later.
If you choose to Pay Later, you will be able to see information regarding payments paid or due, as well as options for making payments on your Client Page. Payments must be made at least 2 days before your appointment.
If you have already paid for this appointment, select the Pay Later option.
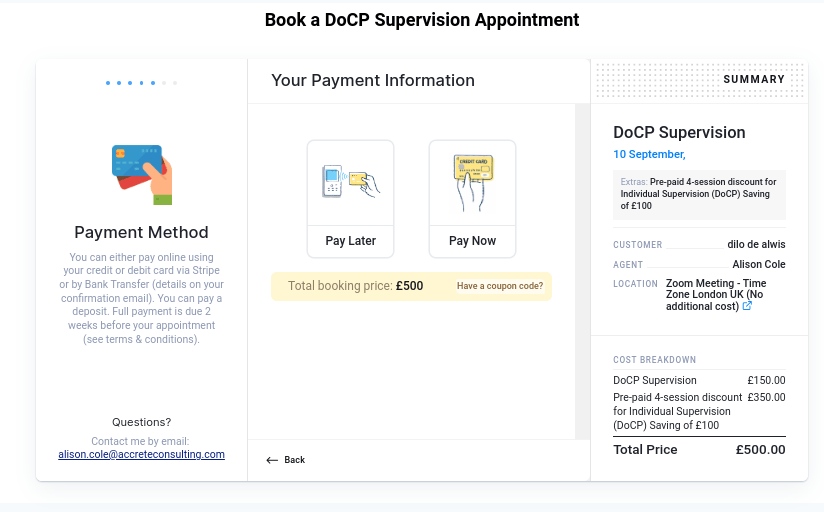
If you select the Pay Now option, you will be directed to Stripe, an online, secure Card payment gateway as seen on the right.
If you decide not to proceed with a card payment, use the return button on the top left.

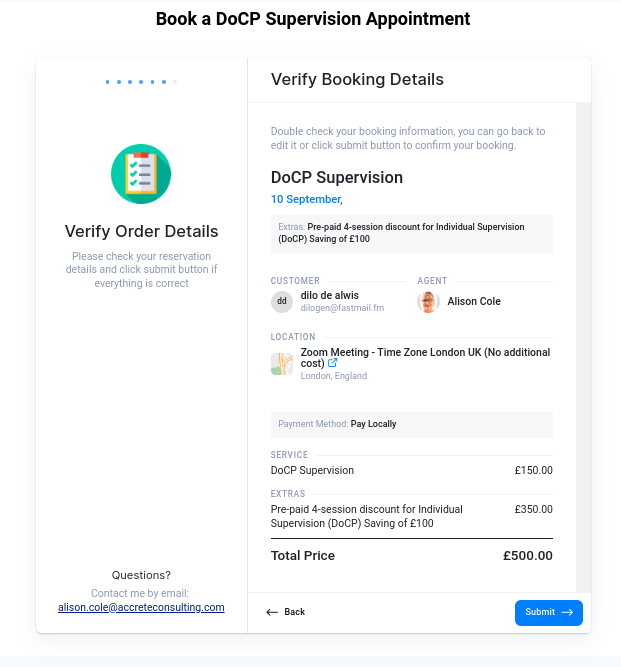
Once you select the payment option, you will see the booking Verification page – if you need to make any corrections, click on the Back button, otherwise use the submit button.
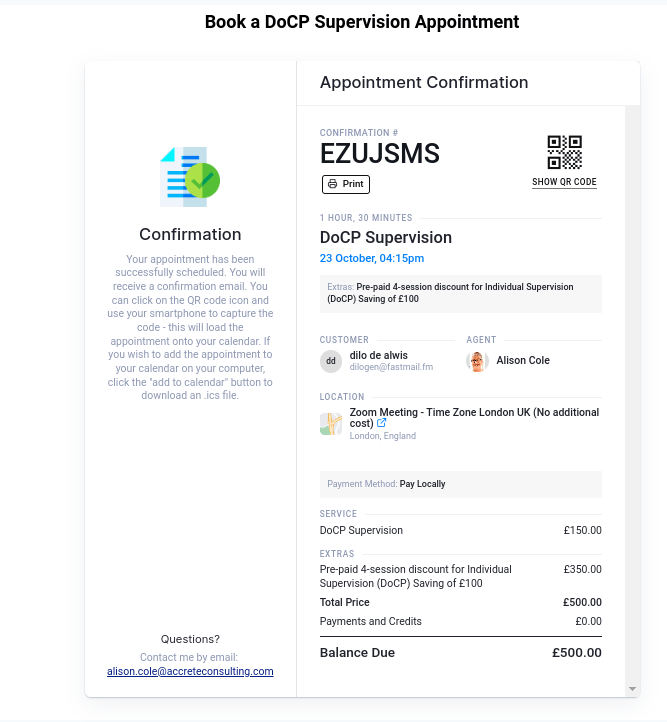
The final Confirmation page will show all the details of your booking.
You will automatically receive an email with these details.
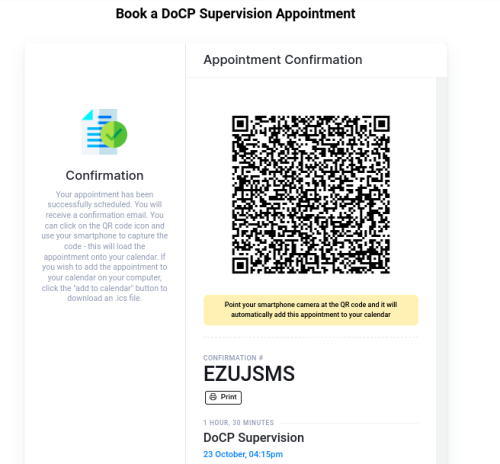
If you made this appointment on your computer or tablet, clicking on the “Show QR code” will enlarge the QR code image which will allow you to scan that on your smartphone. That will automatically add it to the calendar app on your smartphone.
There is also a Print button just below the appointment confirmation code.
If you find any errors on this page, or feel something is unclear, please email us at support@accrete.consulting
Get in touch
Alison Cole | Accrete Consulting Ltd
The Ranch House, Hillside Road, Tatsfield, TN16 2NH
Mobile: +44 7747 608 948
My time zone: GMT / UTC+0 / London
Email: info@accreteconsulting.site

Get in touch
Alison Cole | Accrete Consulting Ltd
The Ranch House, Hillside Road, Tatsfield, TN16 2NH
Mobile: +44 7747 608 948
My time zone: GMT / UTC+0 / London
Email: info@accreteconsulting.site

| Cookie | Duration | Description |
|---|---|---|
| cookielawinfo-checkbox-analytics | 11 months | This cookie is set by GDPR Cookie Consent plugin. The cookie is used to store the user consent for the cookies in the category "Analytics". |
| cookielawinfo-checkbox-functional | 11 months | The cookie is set by GDPR cookie consent to record the user consent for the cookies in the category "Functional". |
| cookielawinfo-checkbox-necessary | 11 months | This cookie is set by GDPR Cookie Consent plugin. The cookies is used to store the user consent for the cookies in the category "Necessary". |
| cookielawinfo-checkbox-others | 11 months | This cookie is set by GDPR Cookie Consent plugin. The cookie is used to store the user consent for the cookies in the category "Other. |
| cookielawinfo-checkbox-performance | 11 months | This cookie is set by GDPR Cookie Consent plugin. The cookie is used to store the user consent for the cookies in the category "Performance". |
| viewed_cookie_policy | 11 months | The cookie is set by the GDPR Cookie Consent plugin and is used to store whether or not user has consented to the use of cookies. It does not store any personal data. |